Sunday, August 9, 2015

File Handling in VB.NET


Today we will look in to file handling in VB.NET.
File handling in VB.NET is not hard to understand and learn because it is very similar to file handling in other programming languages. Though the syntax of the language is different from most of the programming languages.

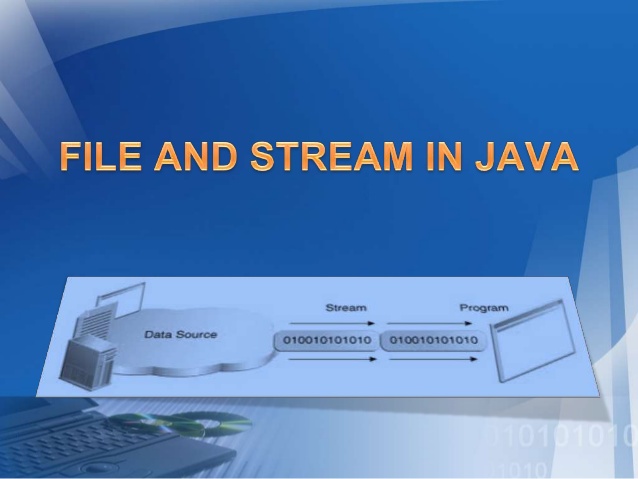
There are many VB.NET I/O stream classes available.

  • BinaryReader - Reads primitive data from a binary stream
  • BinaryWriter - Wrires primitive data in binary format
  • StreamReader - Used to read characters from a byte stream
  • StreamWriter - Used to write characters to a byte stream
There are many other I/O classes available for various purposes.

In order to handle files (read or write to) we have to import the IO class first as follows.

Imports System.IO

Now environment to read and write to files is set.

Let's read from a file to our VB.NET program.
In order to do this we have to create a new object from StreamReader class as shown below.

Dim readObject As New StreamReader("E:/new file.txt") 

StreamReader object needs a one argument in order to create the object. The argument should contain the file path that we need to read from.

Now we can read the file using methods available in the StreamReader class through the object  that we have created recently as follows.


 Dim read As String = readObject.ReadToEnd()
 Dim readFile As String = readObject.ReadLine()

There are many methods available that we can use, above shown are two methods available in the class.

Let's write to a file from our VB.NET program.
In order to do this we have to create an object from StreamWriter class as shown below.

Dim writeObject As New StreamWriter("E:/new file.txt", True)

StreamWriter object needs two arguments to create an object.One argument is same as the StreamReader, it requires the file path that we want to write to. Other argument is true or false. If it is true StreamWriter will append the file. If other argument is false StreamWriter will replace the contents of the file. The default argument is set to false.

writeObject.Write("This text will be written to the file")
writeObject.WriteLine("This text line will be written to the file")

After writing to a file always remember to use the flush method.

writeObject.flush()

With using this method that we can be sure that all the changes that we have done to the file have saved to the hard drive of the computer. Otherwise the changes that are still recorded in the RAM will not be saved to the file.

After opening a file (to read or write to) always remember to close the file. Otherwise it will use the system resources even after the program is closed or when we do not need them.
You can close the file using close() command as follows.

writeObject.close()

Past Topics:-
Like Us on Facebook:-


Comment box is open for your Ideas, Suggestions, Comments and Complaints...!

Wednesday, July 1, 2015

File Handling in Java


Hey Guys, today we will look in to file handling in Java.
File handling in Java is not very hard to understand, it's vary similar to file handling in other programming languages.

Well, let's read a file using Java first. To read a file in Java we can use 2 classes which are in-built.

  • FileReader Class - reads character by character
  • BufferedReader Class - reads word by word

When we are using FileReader Class to read a file,

First of all we have to create a object from the File class to open the file.
File myFile = new File("myTxt.txt");

Then we have to create a object from the FileReader class in order to read the content in the file.
FileReader reader = new FileReader(myFile);

There we have created all the relevant objects. Now let's read the content of the file to an character array.
char myArr[] = new char[200];
reader.read(myArr);


When we use BufferedReader Class to read a file,
First we have to create File and FileReader class objects.
File myFile = new File("myTxt.txt");
FileReader reader = new FileReader(myFile);
BufferedReader buff  = new BufferedReader(reader);

or else we can do the same process using a single line.
BufferedReader buff  = new BufferedReader(new FileReader(new File("myTxt.txt")));

Now we can read line by line using the readLine function().
String line=null;
while((line=buff.readLine())!=null){ //<--- this will check whether the file pointer has reached the end of the file
System.Out.Println(line);
}


Now let's see how to write to a file using Java.
Same as the reading there are 2 classes that we can use to write in to a file.

  • FileWriter - writes character by character to the file
  • BufferedWriter - writes word by word to the file
When we use FileWriter class to write in to a file,
First we have to create an object from the File class and then Should create an object from the File Writer class.
I will sue the short form here to create objects form a single line.
FileWriter writer = new FileWriter(new File("myTxt.txt");

Then we can use write() function to write in to the file.
writer.write("This text will be written in to the file");

We can also use the BufferedWriter class to write in to the files.
BufferedWriter bwriter  = new BufferedWriter(new FileWriter(new File("myTxt.txt")));


After writing to a file it is advisable to use the flush() function, because it will save the data in the memory which is still not written in to the file.
beriter.flush();


After reading or writing to a file(after opening a file) always remember to close the file after using it. close() function is used to close opened files in java. If not it will reserve system resources such as memory and will slow down the program. Maybe degrade the performance of the system.


Past Topics :- 
Like Us on Facebook :-


Comment Box is open for your Comments, Suggestions, ideas and complaints..!

Friday, June 26, 2015

File Handling in C++


Hey, what's up guys??

Today we will look in to File Handling in C++.

Before read or write to files we must know what are the classes or the header files that we must include to our program.
There are three classes:

  • ofstream = Class to write in files
  • ifstream = Class to read from files
  • fstream  = Class to both read and write from and to files
Including the header file to the program can be done as follows:
#include<fstream>

After including the header file we can use all the methods declared in that class. Since C++ is object oriented we must have to create a object from one of the above classes to use the functions.

At first we are using the class to read a file, so its better to create the object from the ofstream class.

ofstream MyObj; //Created a object named MyObj

After creating the object we must first use the open() function to open the file for reading.(or writing)
This function accepts two parameters. First on is the file name and second one is the mode that we want to open the file. Second parameter is optional.

MyObj.open("myTextFile.txt"); //opened a text file named myTextFile.txt in the readable form

After opening the file in the readable format lets write something to the file. First lets define a string variable named myContent. And let's read from the file.

String myContent;
MyObj>>myContent; //Reading the whole file content  and storing in a single string variable

Or else we can read the file line by line.

while(getline(MyObj,myContent)){
    cout<<myContent<<endl;  //this will print the content in the file line by line to the screen till the end of the line reaches
}


Well there, we read the content from a file. Let's try to write in to a file in C++.

To write to a file, first we must open the file in writable mode. We can do it by creating an object from the ofstream and opening the file using open() method.

ofstream myObj2; //created an object using ofstream class
myObj2.open("myTextFile.txt"); //opened a text file named myTextFile.txt in the writable mode


After opening the file in writable form we can simply pass values or variables and write values and content to the file.

myObj2<<"This line will be added to the text file"<<endl;

myObj2<<myContent<<endl;

To check whether the file is still open in the program we can use is_open() method. This method does not accept any arguments and will return a boolean value.

if(myObj2.is_open()){
    //body of the if condition
}


After we read and write and using the file we must close the file from our program. Otherwise it will hold some memory space and will make the program inefficient and affect the system resources badly. To close the filr from the program we can use close() function in C++.

myObj2.close();

These are the basic functions used in file handling in C++.


Past Topics:-
Like Us on Facebook :-


Comment box is open for your comments, ideas, suggestions and complaints!

Sunday, June 21, 2015

File Read and Write in PHP


Hello guys, how are you?

Today we will look in to the File Operations in PHP.

Whether to read or a write to a file, first of all we must open the file using PHP. The function that we use to open a file in PHP is fopen() function. This function accepts two parameters:-

  • file path
  • the mode that the file should be opened
$fp = fopen("input.txt", "r");

Here file is opened and assigned to a variable. This variable is usually called as file pointer. This will make our operations easy.


Modes that we can open a file :-
  • r - read only
  • w - write only(existing data will be re-written)
  • a - write only(new text will be added to the end of the existing text)
  • x - creates a new file for write only
  • r+ - opens a file for read and write
  • w+ - opens a file for read and write
  • a+ - opens a file for read and write
  • x+ - creates a new file for read and write

After opening the file in read  mode we can read the text which is existing in the file and assign it to a PHP variable. To do that we can use fread()  function. This function accepts two parameters.
  • file path
  • maximum bytes to read
$content = fread("input.txt",1024);

Or else we can use the file pointer variable as parameter. If we use that as a parameter it will read the file till it reach the end of the file.

$content = fread($fp);

If we want to read a single line of the file we can do it using fgets() function. This function also accepts two parameters. 
  • file path
  • file open mode
$content = fgets("input.txt","r");
$content = fread($fp);

In some context we maybe want to check whether the file pointer has reached the end of the file. So we can do it using feof() function. This function accepts one parameter which is the file pointer variable.

if(feof($fp)){
     echo("End of the file has reached!");
}

After opening a file for reading or writing purpose we have to close the file. Otherwise the file pointer will keep the file open and that will lead for errors and unexpected problems. To close a file we can use fclose() function. This function accepts one parameter which is also the file pointer variable.

fclose($fp);

These are the basic and most used file handling functions in PHP and there are plenty of more functions available to do various tasks.
Below link will show some more functions :-


Past Topics :-
Like us on Facebook:


Comment box is open for your comments, ideas and suggestions!

Friday, May 8, 2015

Creating PDF Reports and Files in PHP


Hello everyone, how are you guys??
Sorry for my silence in past few days, had some projects and assignments to complete!

Well this article will focus on creating a PDF report or a PDF file using PHP.

So first of all we have to download the FPDF support library to generate PDF files. Visit  http://www.fpdf.org/ and go to downloads and download the latest version.

Well now we are ready to go.

Step 1 :- Import the library to our PHP file.
              include("includes/fpdf/fpdf.php");

Step 2 :- In order to use the functions in FPDF library we have to create a object of fpdf class.
                         $pdf = new FPDF('P','pt','A4');
 In here $pdf is our object name and P is for the page orientation, A4 is for page size.

Step 3 :- Now we have created the object and we have to open the pdf file.
                        //opening the pdf file
              $pdf->Open();

Step 4 :- Then add the first page of the PDF file.
                       //add the first page
             $pdf->AddPage("P","A4");

Step 5 :- Set the X and Y axis for the content in the PDF file
             //setting y axis through a variable
             $Yax = 30;
             $pdf->SetY($Yax);
             //setting X axis directly
             $pdf->SetX(40);


Well now, we have created our pdf file. Remember not to add PHP closing tag in the PDF generating code.

Lets see some functions that we can use to add some text and decorate them.

//setting title
$pdf->SetFillColor(234,44,234);
Above lines will add background color to the text.

//setting font $pdf->SetFont('Arial','B',25);
Above lines will define the font that we want our text to be printed in the PDF file

//adding the text to the pdf file $pdf->Cell(0,30,"Book Catalogue",0,1,"C",1);
Above lines will add the text or the line of text to the PDF file. 
$pdf->Cell(a,b,c,d,e,f,g);
a - X value of the position
b - Y value of the position
c - text that we want to print
d - border value of the text cell
e - line number
f - alignment of the text
g - indicates if the line cell background is filled(true,1) or not(false,0). Default value is false.

//adding more text to the pdf file(paragraphs)
$pdf->Write(0,"Error selecting values from database! ".mysql_error());
$pdf->Write(0,"your paragraph here");
Above lines will add text to pdf file.


At the end of the PHP code we have to add $pdf->Output(); function to make our PDF file visible. Without this function our PDF file will not be generated and printed to the screen.
Well hope you guys got some basic knowledge about generating a PDF file using PHP.
Comment box is open for your ideas, suggestions..
Thank You!

See you guys.. :)


Tuesday, March 31, 2015

System Development Life Cycle (part 1)


System Development Life Cycle(SDLC) is a series of steps or phases that provide a model for the development and life cycle management of an application or a software.
SDLC has 5 major steps or phases :-

  • Evolution
  • Requirement Analysis
  • System Design
  • System Implementation
  • System Testing
Evolution phase includes the identification and defining the need of a new system.
Requirement Analysis phase includes problem identification and analyzing the information need of the end users.
System Design phase includes designing or creating a blueprint with necessary hardware and software requirements.
System Implementation phase includes  creating or coding the final system.
System Testing phase includes evaluating the system's actual functionality in relation to expected functionality.

System Maintenance includes keeping the system up to date with the changes in the organization and technology and ensuring it meets the goals of the organization.


To develop a successful system these phases must be carried out in a certain manner. To full fill this requirement people built models for system development. These models eased the management of the each phase of the life cycle.
Some popular SDLC models are :-
  • Waterfall Model
  • Modified Waterfall Model
  • Iterative Model
  • Spiral Model
  • V Model
  • Big Bang Model
  • Agile Model
  • RAD Model
  • Software Prototyping
  • Incremental Model

Let's discuss some of these models in detail in the next article..!

Comment box is open for your suggestions,ideas and comments.... :)

Sunday, March 29, 2015

System Analysis and Design(SAD) - Part 2 (Types of Information Systems)


System Analysis and Design - Types of Information Systems

Well our today's topic is about Information System Types. We can divide information systems into 3 basic categories. 
  1. Operational Level Information Systems
  2. Middle Level Information Systems
  3. Top Level Information Systems

Operational Level Information Systems are used by Operational level managers and staff which will help in their decision making and making their work easier.
Middle Level Information Systems are used by Middle level managers and staff which will help them in decision making,summarizing data and creating daily,monthly and yearly reports and making their work easier.
Top Level Information Systems are used by the personals which are in the top levels of the organizational hierarchy. They use these kind of information systems to ease their decision making because the behavior and the future of the organization will depend on these decisions so the information which is provided by these kind of information systems must be reliable and accurate.


We can also categorize information systems according to their operational functionality.

  1. Transaction Processing Systems(TPS)
  2. Management Information Systems(MIS)
  3. Decision Support Systems(DSS)
  4. Executive Information Systems(EIS)
  5. Expert Systems(ES)
  6. Communication and Collaboration Systems(CCS)
  7. Office Automation Systems(OAS)

Transaction Processing Systems are designed to capture and process data about day today transactions. 

Management Information Systems are designed for management oriented reporting. These information systems generates reports based on the data which is captured from the Transaction Processing Systems.

Decision Support Systems helps to identify decision support opportunities for top level managers. It provides relevant information to help make decisions and provides its users or the top level managers with decision oriented information whenever decision making situation arises.

Executive Information Systems are also designed for the use of top level managers. These information systems will  support the planning and assessment needs of executive managers. These systems are capable of integrating of data all over the organization into a graphical indicators and controls.

Expert Systems is a programmed decision making information system. It is capable of capturing and reproduce knowledge and expertise of a human expert. It stimulates thinking of the expert. This is a best and an effective way to keep the knowledge of a human experts inside the organizations even though expert have left the organization.

Communication and Collaboration Systems helps to enable more effective  communication between workers,partners,customers and suppliers. Enhances their ability to collaborate.
Office Automation Systems supports wide range of business office activities. It provides improved workflow between workers.

If you haven't read the Introduction - Introduction to Information Systems


Well thanks for reading..Bellow comment box is open for your ideas,comments,suggestions...